The soul food of Japan isn’t ramen or sushi. It’s onigiri. A humble ball of rice shaped by hand, wrapped in nori, and made with care. Found in bento boxes, 7-11s, and family kitchens, onigiri is simple, comforting, and deeply satisfying. This easy recipe shows you how to make it at home with just rice, salt, and nori. No mold needed.
Jump to Recipe
These aren’t your typical 7-11 onigiri.
Step into any Japanese convenience store and you’ll see rows of perfectly wrapped onigiri lined up with military precision.
I rarely buy them. Want to know why?
Nothing compares to the fresh, warm taste of homemade onigiri. Lightly salted and wrapped in crisp seaweed, they’re simple but unforgettable. That first bite of warm rice, paired with a sip of miso soup, is truly something special.
Making onigiri at home is simple and rewarding. With just a few easy steps, you can enjoy fresh, healthy rice balls made exactly the way you like them. They’re naturally preservative-free, affordable, and make a wholesome snack, side, or light meal.
One taste, and you'll never want store-bought again.
When you’re ready, try adding your favorite fillings. Check out my recipes for tuna mayonnaise and salmon onigiri next. I’ll be waiting when you’re hungry for more.
Bookmark or save this post so you can come back when you’re ready to start experimenting with onigiri fillings.
Jump to:
- Why You’ll Love This Easy Onigiri Recipe
- Recipe at a Glance
- Are onigiri the same as rice balls?
- Ingredients
- How to Make Onigiri (Simplest Version)
- Choose the right rice for onigiri
- How to Cook Rice for Making Onigiri
- How to Form Onigiri in Your Hands
- Nori strips (the easiest way)
- How to Wrap Onigiri with Nori (Seaweed) ?
- Onigiri Variations
- Different Ways to Wrap Nori Around Onigiri
- Onigiri Fillings
- What to serve with onigiri
- Storage and Reheating Tips
- Frequently Asked Questions
- More Seaweed-Wrapped Recipes to Try
- Easy Onigiri Recipe (Japanese Rice Balls)
Why You’ll Love This Easy Onigiri Recipe
Onigiri, or Japanese rice balls, are Japan’s ultimate grab-and-go comfort food. They’re like sandwiches in the West, but with no drippy sauces, no utensils, and no mess. Just a perfectly portable triangle of warm, salted rice, made to fit in your hand.
Nothing so simple tastes as comforting as that first bite of freshly made onigiri with a bowl of miso soup.
Onigiri tuck neatly into bento boxes, or you can wrap one or two in parchment or cling wrap to carry in your bag. Pack them for work, school lunches, road trips, picnics, or long flights.
They’re also one of the easiest and most satisfying ways to use up leftover cooked rice, especially when you're short on time but want something homemade.
But beyond convenience, onigiri carry something deeper in Japan: care. A handmade onigiri is its own quiet love language. It’s a small, thoughtful gesture that says, I made this for you. Maybe your mom packed one in your school lunch. Or your partner handed you one on a busy morning. Or now, you’re the one passing that care along.
If you have any questions or want help shaping your first onigiri, leave me a comment. I reply to every message.
❤️ & ? from Japan,
Matt
Recipe at a Glance
Cuisine: Japanese
Best For: Breakfast · Bento lunch · Snack · Side · Light meal
Diet-Friendly: Vegetarian · Vegan · Paleo · Gluten-Free
Skill Level: Beginner (no mold needed)
Are onigiri the same as rice balls?
Outside Japan, they’re often called “rice balls,” but in Japan, they’re simply onigiri (おにぎり). You might also hear them called musubi(むすび)or o-musubi, with the honorific "o" added at the beginning. Rice is a respected and almost sacred food in Japan.
“Rice balls” is simply the most common English translation used to describe onigiri, even though they’re usually shaped more like triangles.
Ingredients
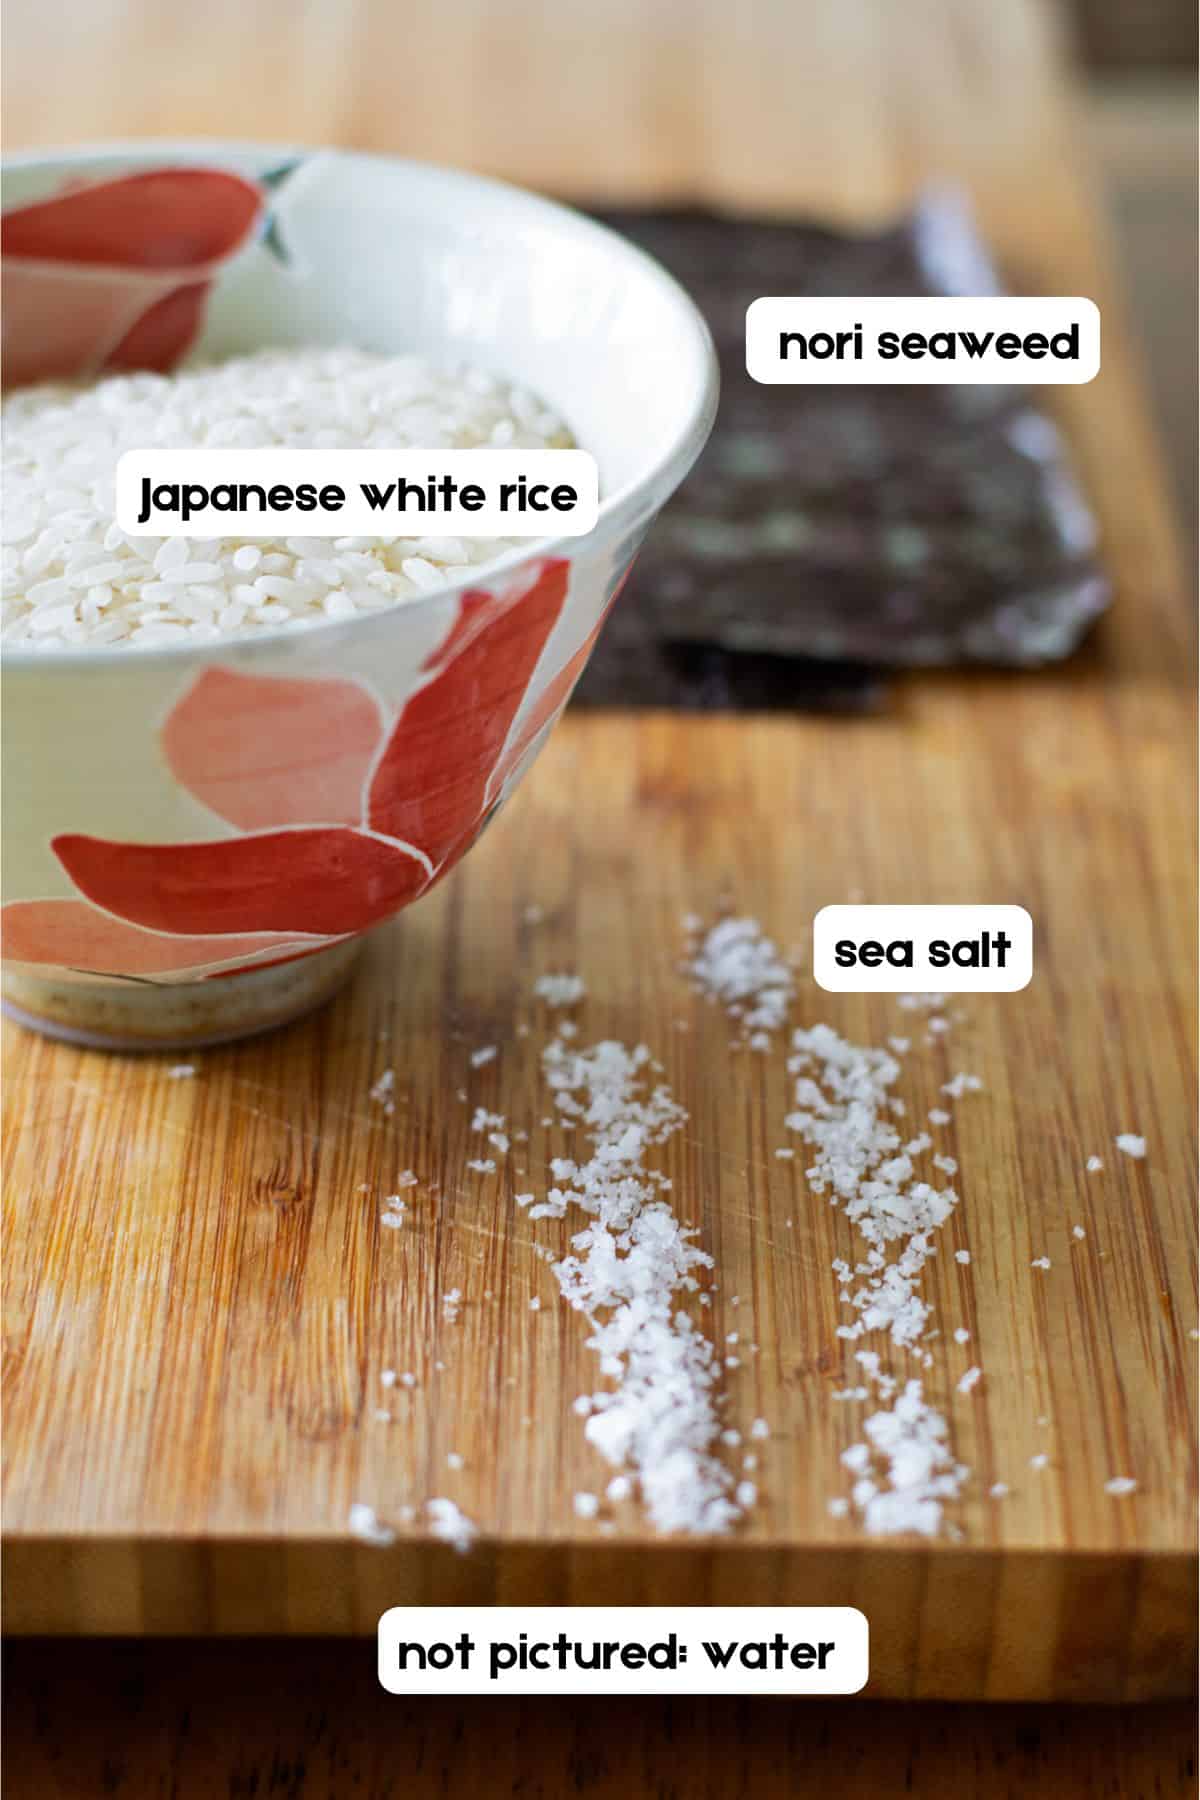
To make these easy onigiri rice balls, you only need two essential Japanese ingredients, plus water and salt.
- Japanese white rice: Sometimes called “sushi rice” outside Japan, it’s key to getting the perfect texture and authentic flavor in your onigiri. Below, I’ll explain why I choose Japanese rice and share other great rice options for making rice balls.
- Water: The quality of water you use when cooking rice matters. For the best-tasting onigiri, use clean, filtered water whenever possible.
- Nori seaweed sheets: Good quality nori makes all the difference in taste and texture. You can buy full sheets and cut them into thirds or purchase pre-cut nori strips made specifically for wrapping onigiri.
- Salt: I prefer fine-grain sea salt or kosher salt instead of coarse salt for seasoning. Properly salted onigiri have just the right balance to bring out the rice’s flavor.
How to Make Onigiri (Simplest Version)
Let’s start with the most classic version: shio onigiri (塩おにぎり). Shio simply means “salt.” These onigiri are made with Japanese short-grain white rice and salt, hand-wrapped in crisp nori seaweed. There’s no filling, which makes them the easiest and one of the most traditional types to make.
Before we dive in, I’ll walk you through your three main options for cooking rice. Then we’ll go step by step to shape it into triangle-shaped rice balls, ready to wrap and enjoy.
Choose the right rice for onigiri
Not all rice is suited for onigiri. To achieve the signature texture and shape, you’ll need the right type of rice and careful cooking. Choosing the best rice for onigiri is the first step to making rice balls that hold together beautifully and taste the way they should.
Expert Tips
- Use Japanese short-grain rice. Its natural stickiness helps the rice hold its shape and form tight, compact onigiri. Korean short-grain rice is also a good substitute.
- Avoid long- and medium-grain rice. Varieties like jasmine or basmati don’t contain enough starch to stick together, so your rice balls are likely to fall apart.
- Choose high-quality rice. Premium Japanese rice has better texture and flavor, making even the simplest onigiri taste extra satisfying.
The best rice for onigiri
Here are some great Japanese rice options grown in the U.S.:
- Tamanishiki Super Premium Short Grain Rice — My favorite brand for onigiri. It strikes the perfect balance of stickiness and flavor.
- Tamaki Gold and Shirakiku — Both are popular koshihikari rice brands grown in California and widely available.
- Lundberg Family Farms Short-Grain Japanese Rice — An organic option grown in California. I haven’t tried it yet but it’s marketed for sushi-style cooking.
Many high-end sushi restaurants in the U.S., especially in California and New York, often use premium California-grown rice like Tamanishiki or Tamaki Gold when they don’t import rice directly from Japan.
Onigiri on a budget (outside of Japan):
In Japan, rice quality tends to be higher than the standard brands commonly found in the U.S., like Nishiki, Botan Calrose, and Kokuho Rose. Outside Japan, the cost of premium rice can be the biggest barrier to making truly great-tasting onigiri.
If you only have access to more budget-friendly Japanese rice, try making seasoned yaki onigiri. These grilled rice balls are brushed with soy sauce or miso, which adds flavor and helps mask any slight texture differences from less expensive rice. Adding a little melted butter on top makes them even more delicious.

How to Cook Rice for Making Onigiri
Getting the rice right is key to making great onigiri. Japanese short-grain rice should be washed, rinsed thoroughly, and soaked for 20 to 30 minutes before cooking. The water-to-rice ratio also matters. I use 1 part white rice to 1.1 parts water.
If you’re new to cooking Japanese rice, don’t skim the directions (like I sometimes do). A little extra care goes a long way toward achieving the perfectly sticky, fluffy texture onigiri needs.
1. Stovetop Method
No rice cooker? No problem. You can cook Japanese rice in a regular pot on the stove. I recommend following Just One Cookbook’s stovetop rice tutorial, which gives clear, beginner-friendly steps.
2. Rice Cooker
Many rice cookers have a preset for Japanese white rice. If yours does, use that setting and follow the instructions on your rice bag. For extra clarity, Just One Cookbook’s rice cooker method is also helpful.
3. Donabe (Clay Pot Method)
At home, I often use a donabe, a traditional Japanese earthenware pot, especially when cooking for guests. It makes beautifully fluffy rice with a satisfying, slightly chewy texture.
I bought mine from Kimono Mom. You can follow her video tutorial on how to cook rice in a donabe. You can also refer to these written directions for cooking rice in a donabe.
Donabe rice is exceptional, though good-quality pots can be pricey.

Onigiri get their name from the verb nigiru. Nigiru is the action of forming rice into a ball using your hands. It's like making a snowball. Onigiri can be spheres, actual rice balls. But I'm going teach you how to make the classic triangle shape, just like you'd find in a Japanese convenience store.
How to Form Onigiri in Your Hands
Step 1: Wet your hands
Dip both your (immaculately clean) hands into a bowl full of water. Shake off the excess water. Next, lightly dip your wet fingers into a small dish of salt. Rub the salt to cover your palms.
Step 2: Make a ball
Let your rice cool just enough so it's not too hot to handle. Scoop up enough rice to make one onigiri. Like making a snowball in two hands, gently form the rice into a sphere.
Step 3: Position hands into v-shape
Hold the ball of rice in the palm of your non-dominant hand. Bend your palm to make a v-shaped "valley". Cover the rice ball with your dominant hand with your forearms making a 90-degree angle. Your dominant hand makes a "mountain" to cover the rice— think Mt. Fuji.
Step 4: Shape rice ball into a triangle
Then, gently squeeze the rice ball with your top hand to form one corner of a triangle. Next, rotate the rice ball towards you 90 degrees. Again, gently squeeze with your top, v-shaped hand to form another corner to make a triangle. Repeat this rotate and gentle squeezing process until you've made a neat triangle shape.
Food Safety Concerns (bare hands):
Before making onigiri with your bare hands, wash your hands very well with soap and warm water. If you have any kind of cuts, sores, or abrasions on your hands, be sure to wear gloves.
If you're still concerned with hygiene, I'd recommend using the plastic wrap or plastic bag method for making onigiri. This is a good idea if you're serving guests or anyone with health risks. Unfortunately, this isn't as environmentally friendly as the traditional way.

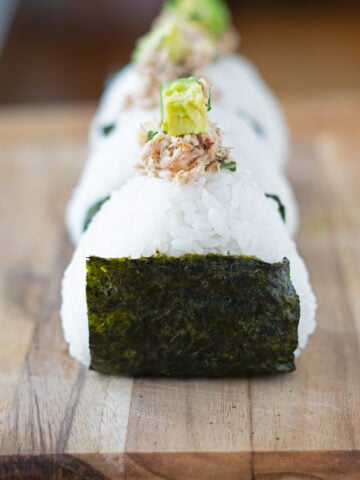
Nori strips (the easiest way)
Cut nori seaweed sheet into strips. I prefer to cut strips ⅓ of a full-size sheet. Shorten strips as needed.
Alternatively, you can buy nori sheets that are already cut into the perfect size for onigiri. You should be able to find packages of ⅓ size nori at Japanese supermarkets like Nijiya.
How to Wrap Onigiri with Nori (Seaweed) ?
- Place the nori strip shiny side down on a clean surface.
- Position the triangle-shaped rice ball with one of its faces on top of the nori strip.
- Attach the rough side of the nori strip to the face of the rice ball.
- Wrap the nori strip around the flat bottom of the rice ball.
- Gently press and rub the nori strip until it is firmly attached to the rice ball.

Onigiri Variations
There are many different kinds of onigiri. There are various shapes and lots of different fillings.
Different Shapes
- triangular shape: Follow the directions in the recipe card below to make this shape.
- flattened round shape: These are the easiest shape to form. They are just like triangular-shaped onigiri without the corners.
- tawara: These are cylinder-shaped onigiri that look like a log wrapped in seaweed.
Different Styles
- plain: These onigiri are not wrapped with nori seaweed. They are only seasoned with salt.
- wrapped with nori: There are three different ways to wrap triangular-shaped onigiri with seaweed.
- sprinkled: It's typical to sprinkle sesame seeds or furikake seasoning on top of a plain rice onigiri.
- mixed rice: You can find onigiri made with mixed ingredients such as fried rice. A common version is called takikomi gohan, Japanese "mixed rice". Takikomi gohan is made with cooked seasonal vegetables, mushrooms, cooked fish, etc.
- onigirazu: These are a flat, regular shape with fillings just like a sandwich.
Different Ways to Wrap Nori Around Onigiri
- Half-wrap: ? A strip of nori is wrapped around half of the onigiri, making it easy to hold.
- Kimono Wrap: Imagine an onigiri wearing a kimono. Often, some of the filling is added on top so you can see what's inside.
- Japanese Convenience Store Style: Using an onigiri plastic wrapper, you can separate the rice and nori to prevent the dried seaweed sheet from getting soggy.
- Visible Inside: a strip of nori is wrapped around the circumference (sides) to show off the inside.
- Alternative Wraps: In addition to nori, onigiri can be wrapped with shiso, pickled cabbage, pickled leaves, and tororo kombu seaweed.
Onigiri for Children (Creative, fun shapes!)
- animal characters (panda, etc.)
- manga (Doraemon, etc.)
- cartoon characters
Onigiri Fillings
These are the most common onigiri fillings I see everywhere in Japan. Making onigiri with fillings isn't much more difficult than plain onigiri.
- tuna mayo
- salmon
- pickled plum
- tarako (cod roe)
- mentaiko (spicy cod roe)
- okaka (bonito flakes seasoned with soy sauce)
- konbu (simmered kelp)
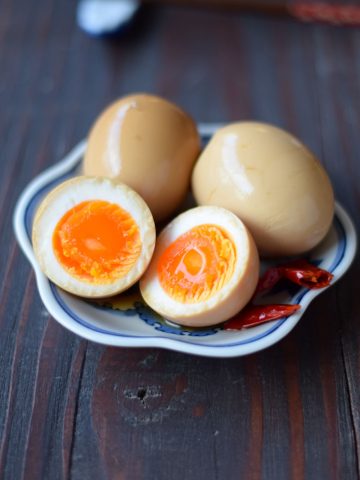
This list is just the basics. At an onigiri shop in Japan, you'll find onigiri filled with shrimp tempura, ajitamago seasoned eggs, fried rice, and bulgogi marinated beef. Nowadays with Instagram, the list of creative fillings is always growing.
What's your favorite filling?

What to serve with onigiri
Traditionally onigiri is paired with a bowl of miso soup. When you order onigiri at a restaurant, it usually comes with tsukemono, Japanese-style pickles.
Onigiri also goes well with these savory, umami-ful dishes:


Storage and Reheating Tips
Onigiri taste much better fresh! But if you have to keep them for later, follow these guidelines.
How to Store Onigiri Safely
- Unless you are going to eat your onigiri immediately, it's important to salt your rice. Adding salt and letting the rice cool is crucial for proper hygiene. The salt helps to delay spoilage.
- Once your onigiri have cooled down to room temperature, wrap them completely in plastic wrap and store in the fridge. I recommend eating refrigerated onigiri by the following day.
- If you've already wrapped your onigiri with nori, you may want to remove it before refrigerating. Otherwise, the nori will get soggy. Before eating, you can rewrap your onigiri with a fresh strip of nori.
- Freshly made onigiri can be packed in a lunch box in the morning and eaten as is for lunch. Using a bento box is the most environmentally friendly way to store onigiri.
Can You Reheat Onigiri?
- Typically, onigiri are not reheated.
- If you want to warm them up, remove the plastic wrap and microwave in 10–15 second intervals until just warm.
Frequently Asked Questions
Yes, onigiri are Japanese rice balls. "Rice balls" is the English translation that's most typically used. Musubi is another word that also means rice balls.
The Korean version of rice balls are pretty similar to onigiri. They're called jumeokbap. The triangular-shaped rice balls sold at convenience stores in Korea are called samgak kimbap.
For best results, use Japanese short-grain rice. Outside of Japan, it's sometimes labeled "sushi rice". At natural food stores in Japan, you'll also find onigiri made with genmai brown rice.
Japanese rice is sticky, which is ideal for making onigiri. If you attempt to make onigiri with the normal rice you'd find at your local supermarket, it may not hold together. To make it worth your effort, I recommend finding the right short-grained rice at an Asian, Japanese, or Korean market or online.
If the rice you want to use is short or medium-grain such as Calrose, it may work for onigiri.
There's really no trick to getting rice balls to stick. If you use the right type of rice and cook it properly, it will naturally stick together.
Japanese rice is sticky on its own. No additional ingredients are needed to make the rice stick.
No, you don't need a mold to make onigiri. For making homemade onigiri, using an onigiri mold is just a personal preference. The advantage of a mold is being able to make onigiri a consistent size and shape.
If you have food safety concerns about making onigiri with your bare hands, using either the plastic wrap method or an onigiri mold are both good alternatives.
No, you don't add vinegar to rice to make onigiri. Adding vinegar to rice is for making sushi.
Onigiri is easily confused with sushi. Only salt is used to season the rice used to make onigiri.
More Seaweed-Wrapped Recipes to Try


Tried this onigiri recipe? ?✨ I’d love to see how your rice balls turned out!
Tag @eyesandhour ? on Instagram. Drop a ⭐️⭐️⭐️⭐️⭐️ rating & comment below—your feedback helps others discover this recipe!

Easy Onigiri Recipe (Japanese Rice Balls)
Ingredients
Rice
- ¾ cup ¾ cup Japanese short-grain rice equal to one "rice cooker cup"
- 200 ml water ⅞ US cup
- ¼ teaspoon salt fine-grained sea salt or kosher salt
Wrap
- 1 sheet dried nori seaweed
Instructions
Preparing Rice
- Transfer freshly cooked rice from your rice cooker or pot to a large bowl or glass baking dish.
- Using a spatula, gently spread out the rice to cover the bottom of your bowl.
- Sprinkle with salt (¼ tsp) and mix into rice by lightly tossing and folding over.
- Cool the rice until you no longer see clouds of steam and the rice has cooled just enough that you can hold it in your bare hands.
Shape Onigiri by Hand
- Fill a bowl with room temperature water and a small dish with salt. Keep these nearby to use as needed.
- Using your spatula, divide the cooked rice into three equal sections in your bowl or pan.
- Dip both of your (immaculately clean) hands into your bowl of water. Shake off the excess water.
- Using your hands or spatula, scoop up enough rice to make one onigiri.
- First, like making a snowball in two hands, gently form the rice into a sphere. Make it a ball shape but not too compact.
- Place the sphere of rice in the palm of your non-dominant hand. Bend your palm to make a v-shaped "valley".
- Bend the fingers of your other hand to make an upside-down v-shape. Cover the rice ball with your V-shaped dominant hand. Your dominant hand makes a "mountain" to cover the rice— think Mt. Fuji.
- Then, gently squeeze the rice ball with your top v-shaped hand to form one corner of a triangle.
- Next, flip the rice ball 90 degrees towards you. The first corner of your triangle should now be resting on the palm of your bottom hand.
- Again, gently squeeze with your top, v-shaped hand to form another corner to make a triangle.
- Repeat this rotate and squeezing process until you've made a neat triangle shape.
Wrap Onigiri with Nori Seaweed
- Cut nori seaweed sheet into strips with a sharp knife or kitchen scissors. I prefer to cut strips ⅓ of a full-size sheet. Trim strips shorter so the nori will cover ⅔s of each side of onigiri.
- Hold the onigiri in one hand. Place the strip of nori under the bottom edge of the rice ball, shiny side out and rough side against the rice.
- Wrap the ends of the nori up along the sides, pressing gently to secure it in place.
- Stand the onigiri vertical on a plate.
- Serving onigiri warm for the best taste. Or, set them aside to let them cool to room temperature.
Rinz says
Turned out perfectly!
Matt says
Yay!Thanks for leaving the 5 star review! I'm working on new onigiri next month. Would love to know what fillings you're interested in.
Meenakshi says
The way you presented this is both bold and captivating. It’s always exciting to see fresh takes like this.
Matt says
Thank you, Meenakshi! I appreciate your thoughtful words and support. I poured a ton of time and effort into this one and love it!